구영모_자율주행 RC카 제작 결과 보고서
활동 보고서
구*모
2024-07-26
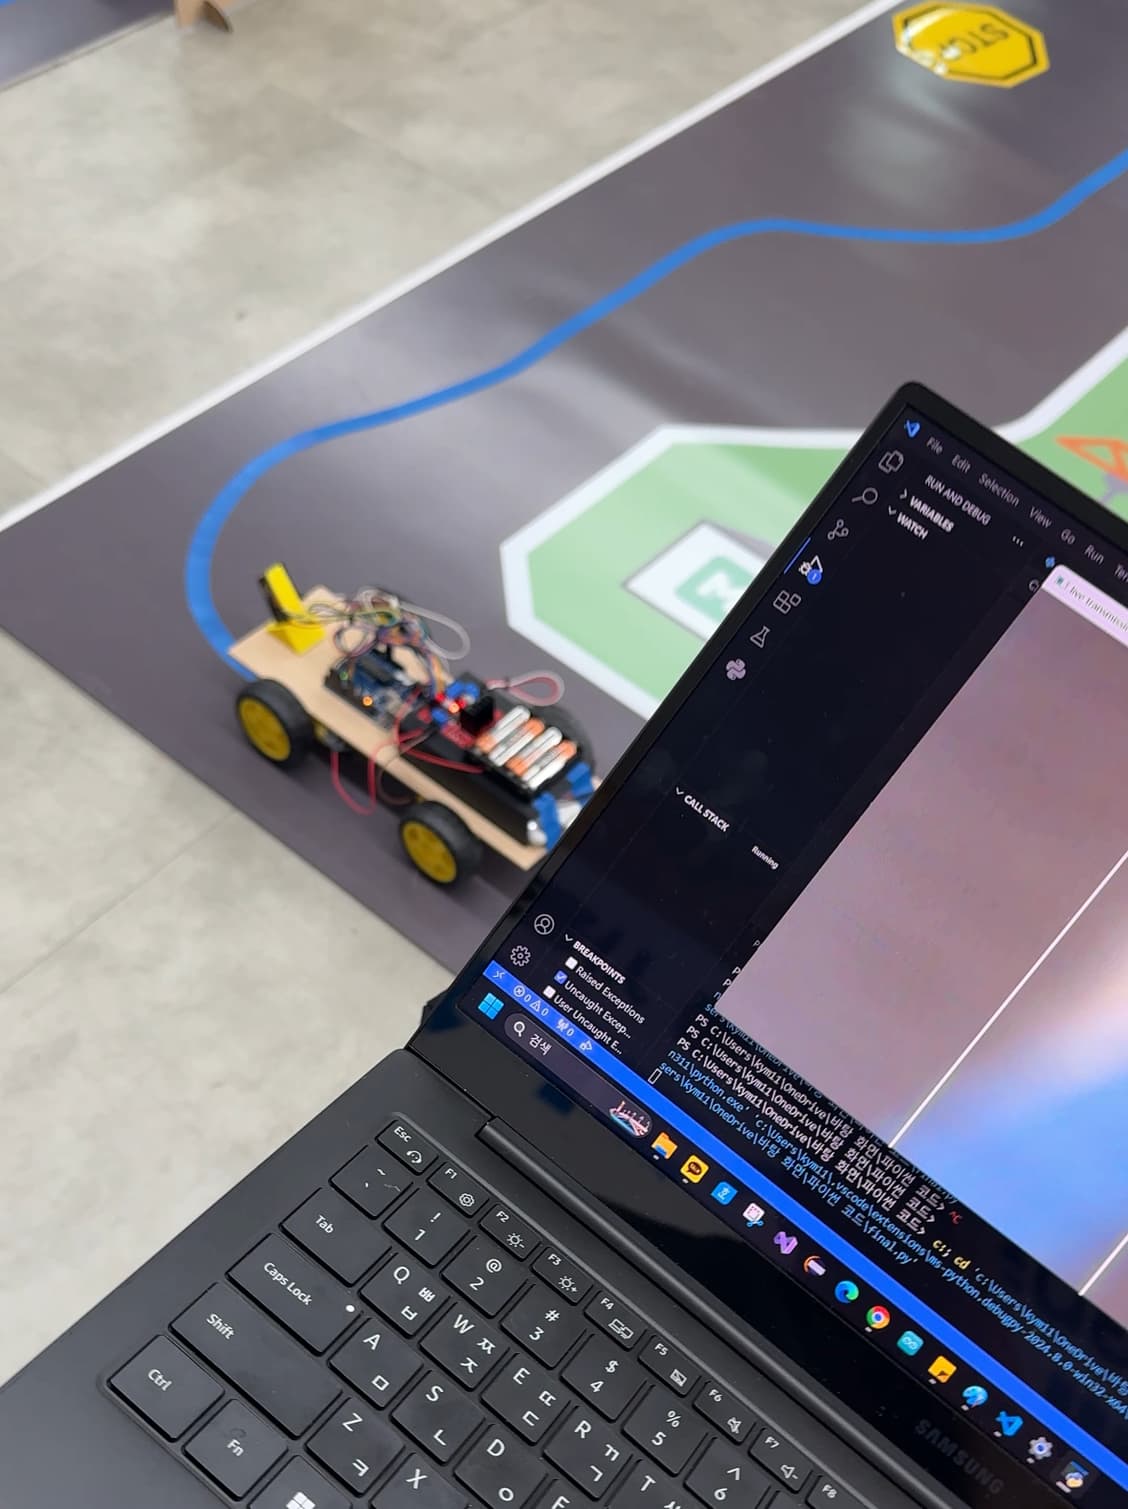
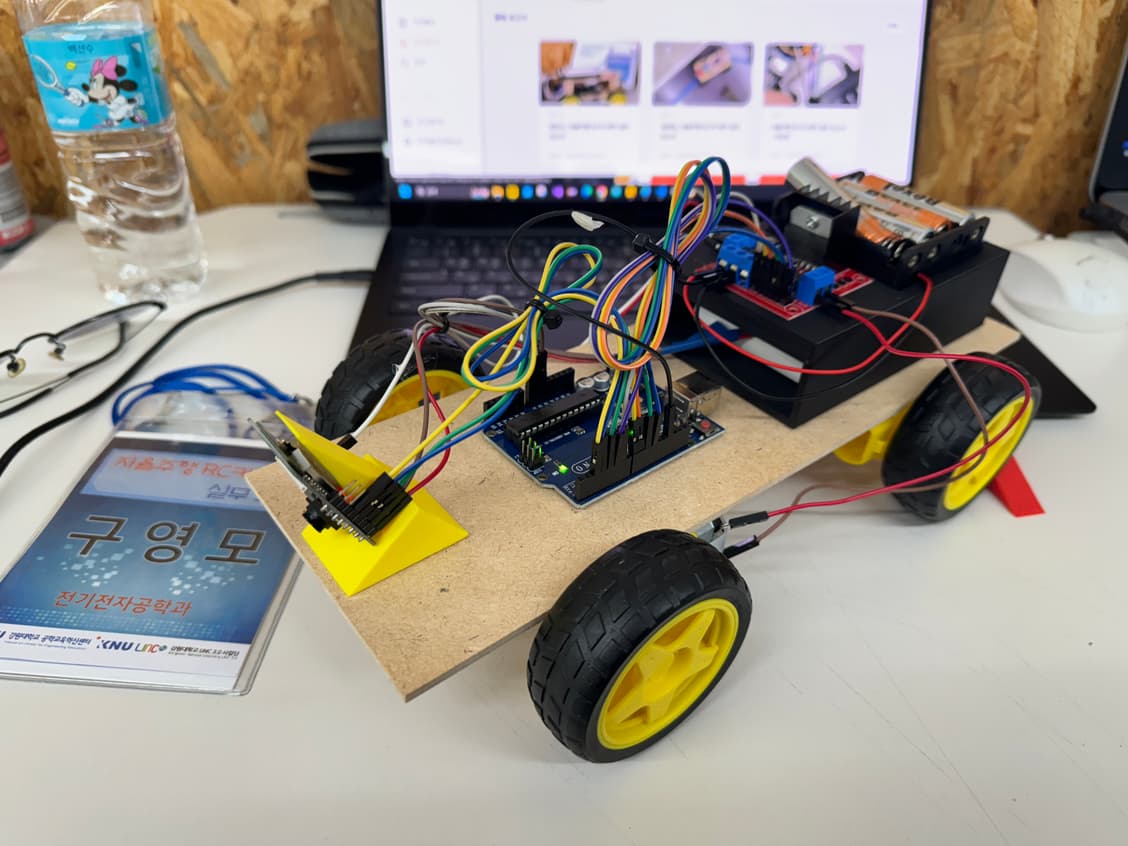

[프로젝트 개요] - 아두이노, 3D 프린터기를 사용하여 자율주행 RC카 관련 실무 교육을 받고, RC카 제작을 해본다. [설계 및 계획] - RC카 하드웨어 구성 - 아두이노와 ESP32cam를 이용하여 RC카를 작동시킨다. [제작 과정] 1. 하드웨어 구성 - 보조 배터리가 들어갈 위치와 배터리팩, L298N을 넣을 공간을 위하여 3D 프린터기로 제작 - 카메라를 아래로 향하게 붙일 수 있도록 3D 프린터기를 이용해 부품 제작 - 대략적인 회로 구성과 위치를 정하고 코드를 아두이노와, ESP32cam에 넣어주었음 - 글루건으로 회로판, 배터리 팩, 3D프린팅 부품 등 부착 -파이썬 코드를 이용하여 RC카와 통신하게 함 [코드 구조 및 설명] import cv2 import urllib.request import numpy as np import time IP_ADDR = '192.168.0.61' // 전진, 후진, 우회전, 좌회전 관련 코드 def go_backward(): urllib.request.urlopen('http://'+IP_ADDR+':80/command?cmd=a') time.sleep(0.05) def turn_left(): urllib.request.urlopen('http://'+IP_ADDR+':80/command?cmd=c') time.sleep(1) def turn_right(): urllib.request.urlopen('http://'+IP_ADDR+':80/command?cmd=b') time.sleep(1) def calibrate_left(): urllib.request.urlopen('http://'+IP_ADDR+':80/command?cmd=c') time.sleep(0.08) def calibrate_right(): urllib.request.urlopen('http://'+IP_ADDR+':80/command?cmd=b') time.sleep(0.08) def go_forward(): urllib.request.urlopen('http://'+IP_ADDR+':80/command?cmd=d') time.sleep(0.12) def stop(): urllib.request.urlopen('http://'+IP_ADDR+':80/command?cmd=e') def onMouse(event, x, y, flags, param): if event == cv2.EVENT_LBUTTONDOWN: print(x, y) cv2.namedWindow("live transmission", cv2.WINDOW_AUTOSIZE) stop_cnt = 0 while True: img_resp = urllib.request.urlopen('http://'+IP_ADDR+'/cam-hi.jpg') imgnp = np.array(bytearray(img_resp.read()), dtype=np.uint8) frame = cv2.imdecode(imgnp, -1) (h1, w1) = frame.shape[:2] frame = frame[600:h1, :] // 왼쪽 상단, 하단 및 우측 상단 하단의 좌표를 알맞게 정해줌 (h, w) = frame.shape[:2] topLeft = (220, 0) topRight = (1300, 0) bottomLeft = (0, 600) bottomRight = (1539, 600) pts1 = np.float32([topLeft, topRight, bottomRight, bottomLeft]) w1 = abs(bottomRight[0] - bottomLeft[0]) w2 = abs(topRight[0] - topLeft[0]) h1 = abs(topRight[1] - bottomRight[1])+600 h2 = abs(topLeft[1] - bottomLeft[1])+600 width = int(max([w1, w2])) # 두 좌우 거리간의 최대값이 서류의 폭 height = int(max([h1, h2])) # 두 상하 거리간의 최대값이 서류의 높이 pts2 = np.float32([[0, 0], [width - 1, 0], [width - 1, height - 1], [0, height - 1]]) # 변환 행렬 계산 mtrx = cv2.getPerspectiveTransform(pts1, pts2) # 원근 변환 적용 frame = cv2.warpPerspective(frame, mtrx, (width, height)) # 파란색, 빨간색, 초록색 채널 추출 blue_channel = frame[:, :, 0] green_channel = frame[:, :, 1] red_channel = frame[:, :, 2] # 조건에 맞는 픽셀 필터링 blue_filtered = np.zeros_like(blue_channel, dtype=np.uint8) blue_mask = np.logical_and(blue_channel >= 150, np.logical_and(red_channel <= 140, green_channel <= 190)) blue_filtered[blue_mask] = 255 # 이진화를 위해 255로 설정 kernel = np.ones((5, 5), np.uint8) blue_filtered = cv2.morphologyEx(blue_filtered, cv2.MORPH_OPEN, kernel) edges = cv2.Canny(blue_filtered, 10, 100, apertureSize=3) (w, h) = blue_filtered.shape[:2] points = cv2.findNonZero(blue_filtered) if points is not None: meaned_point = np.mean(points, axis=0)[0] meaned_point_x = int(meaned_point[0]) meaned_point_y = int(meaned_point[1]) cv2.circle(frame, (meaned_point_x, meaned_point_y), 5, (255, 255, 255), -1) cv2.line(frame, (h//3, 0), (h//3, w), (255, 255,255), 5) cv2.line(frame, (h//3*2, 0), (h//3*2, w), (255, 255,255), 5) if meaned_point_x < (h//3): calibrate_left() elif meaned_point_x > (h//3*2): calibrate_right() else: go_forward() else: go_backward() frame = cv2.resize(frame, None, fx=0.5, fy=0.5, interpolation=cv2.INTER_AREA) cv2.imshow("live transmission", frame) cv2.setMouseCallback("live transmission", onMouse) key = cv2.waitKey(5) if key == ord('q'): stop() break stop() cv2.destroyAllWindows() [성능 테스트 및 평가] - 바퀴 3개로 하드웨어를 구성하였었는데, 바퀴 하나가 계속 회전하여 무동력 바퀴 2개로 수정하여 바퀴를 4개로 만들었더니 안정성이 더 높아짐 - 처음 코드를 짰을 때는 후진 빈도가 높아서 blue_mask에 해당하는 범위를 위주로 수정하였음 - 그 이후로 go_backward() , turn_left(), turn_right() , calibrate_left() , calibrate_right() , go_forward()의 time.sleep 값을 위주로 조정하였음 - turn_left(), turn_right(), calibrate_left(), calibrate_right(), go_foward의 time.sleep 값을 각각 1, 1, 0.08, 0.08, 0.12로 설정 하였을 때 기록이 2분 30초로 단축되었음. [결과 및 결론] - 바퀴 3개보다 바퀴 4개인게 더 안정성 있었고, blue_mask 범위와 time.sleep 값을 적절히 수정하면 더욱 더 안정적인 운행이 가능했다. - 시간이 없어서 시도하지 못 했지만 앞 바퀴와 아래 바퀴의 간격을 좀 더 작게하면, 경로를 이탈하지 않을 것 같다.